In this tutorial, you’ll learn how to save your Pandas DataFrame or DataFrames to Excel files. Being able to save data to this ubiquitous data format is an important skill in many organizations. In this tutorial, you’ll learn how to save a simple DataFrame to Excel, but also how to customize your options to create the report you want!
By the end of this tutorial, you’ll have learned:
- How to save a Pandas DataFrame to Excel
- How to customize the sheet name of your DataFrame in Excel
- How to customize the index and column names when writing to Excel
- How to write multiple DataFrames to Excel in Pandas
- Whether to merge cells or freeze panes when writing to Excel in Pandas
- How to format missing values and infinity values when writing Pandas to Excel
Let’s get started!
Table of Contents
The Quick Answer: Use Pandas to_excel
To write a Pandas DataFrame to an Excel file, you can apply the .to_excel() method to the DataFrame, as shown below:
# Saving a Pandas DataFrame to an Excel File
# Without a Sheet Name
df.to_excel(file_name)

# With a Sheet Name
df.to_excel(file_name, sheet_name='My Sheet')

# Without an Index
df.to_excel(file_name, index=False)
Understanding the Pandas to_excel Function
Before diving into any specifics, let’s take a look at the different parameters that the method offers. The method provides a ton of different options, allowing you to customize the output of your DataFrame in many different ways. Let’s take a look:
# The many parameters of the .to_excel() function
df.to_excel(excel_writer, sheet_name='Sheet1', na_rep='', float_format=None, columns=None, header=True, index=True, index_label=None, startrow=0, startcol=0, engine=None, merge_cells=True, encoding=None, inf_rep='inf', verbose=True, freeze_panes=None, storage_options=None)
Let’s break down what each of these parameters does:
| Parameter | Description | Available Options |
|---|---|---|
excel_writer= | The path of the ExcelWriter to use | path-like, file-like, or ExcelWriter object |
sheet_name= | The name of the sheet to use | String representing name, default ‘Sheet1’ |
na_rep= | How to represent missing data | String, default '' |
float_format= | Allows you to pass in a format string to format floating point values | String |
columns= | The columns to use when writing to the file | List of strings. If blank, all will be written |
header= | Accepts either a boolean or a list of values. If a boolean, will either include the header or not. If a list of values is provided, aliases will be used for the column names. | Boolean or list of values |
index= | Whether to include an index column or not. | Boolean |
index_label= | Column labels to use for the index. | String or list of strings. |
startrow= | The upper left cell to start the DataFrame on. | Integer, default 0 |
startcol= | The upper left column to start the DataFrame on | Integer, default 0 |
engine= | The engine to use to write. | openpyxl or xlsxwriter |
merge_cells= | Whether to write multi-index cells or hierarchical rows as merged cells | Boolean, default True |
encoding= | The encoding of the resulting file. | String |
inf_rep= | How to represent infinity values (as Excel doesn’t have a representation) | String, default 'inf' |
verbose= | Whether to display more information in the error logs. | Boolean, default True |
freeze_panes= | Allows you to pass in a tuple of the row, column to start freezing panes on | Tuple of integers with length 2 |
storage_options= | Extra options that allow you to save to a particular storage connection | Dictionary |
.to_excel() methodHow to Save a Pandas DataFrame to Excel
The easiest way to save a Pandas DataFrame to an Excel file is by passing a path to the .to_excel() method. This will save the DataFrame to an Excel file at that path, overwriting an Excel file if it exists already.
Let’s take a look at how this works:
# Saving a Pandas DataFrame to an Excel File
import pandas as pd
df = pd.DataFrame.from_dict(
{'A': [1, 2, 3], 'B': [4, 5, 6], 'C': [7, 8, 9]}
)
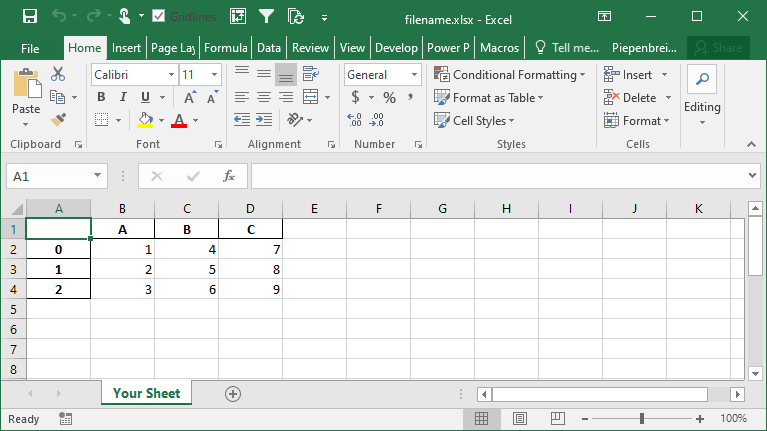
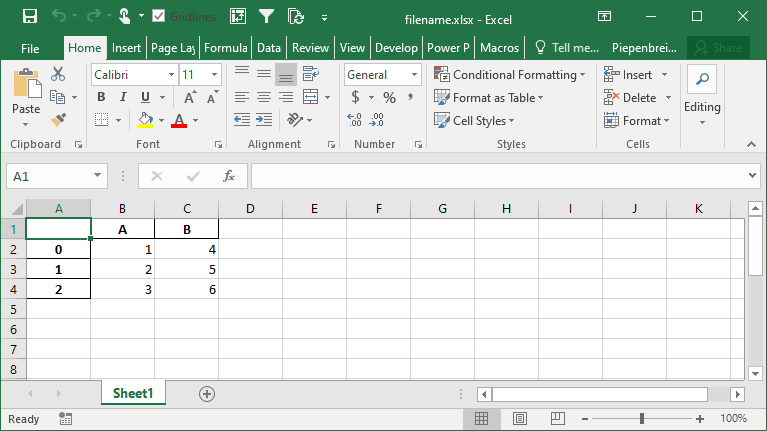
df.to_excel('filename.xlsx')Running the code as shown above will save the file with all other default parameters. This returns the following image:

You can specify a sheetname by using the sheet_name= parameter. By default, Pandas will use 'sheet1'.
# Specifying a Sheet Name When Saving to Excel
import pandas as pd
df = pd.DataFrame.from_dict(
    {'A': [1, 2, 3], 'B': [4, 5, 6], 'C': [7, 8, 9]}
)

df.to_excel('filename.xlsx', sheet_name='Your Sheet')
This returns the following workbook:
In the following section, you’ll learn how to customize whether to include an index column or not.
How to Include an Index when Saving a Pandas DataFrame to Excel
By default, Pandas will include the index when saving a Pandas Dataframe to an Excel file. This can be helpful when the index is a meaningful index (such as a date and time). However, in many cases, the index will simply represent the values from 0 through to the end of the records.
If you don’t want to include the index in your Excel file, you can use the index= parameter, as shown below:
# How to exclude the index when saving a DataFrame to Excel
import pandas as pd
df = pd.DataFrame.from_dict(
    {'A': [1, 2, 3], 'B': [4, 5, 6], 'C': [7, 8, 9]}
)

df.to_excel('filename.xlsx', index=False)
This returns the following Excel file:
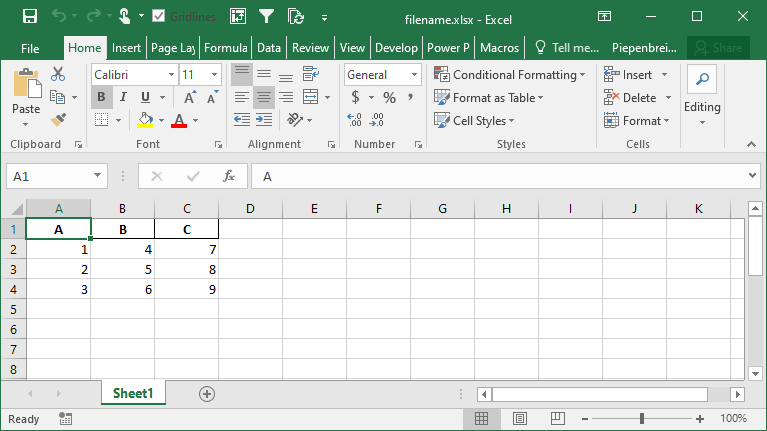
In the following section, you’ll learn how to rename an index when saving a Pandas DataFrame to an Excel file.
How to Rename an Index when Saving a Pandas DataFrame to Excel
By default, Pandas will not named the index of your DataFrame. This, however, can be confusing and can lead to poorer results when trying to manipulate the data in Excel, either by filtering or by pivoting the data. Because of this, it can be helpful to provide a name or names for your indices.
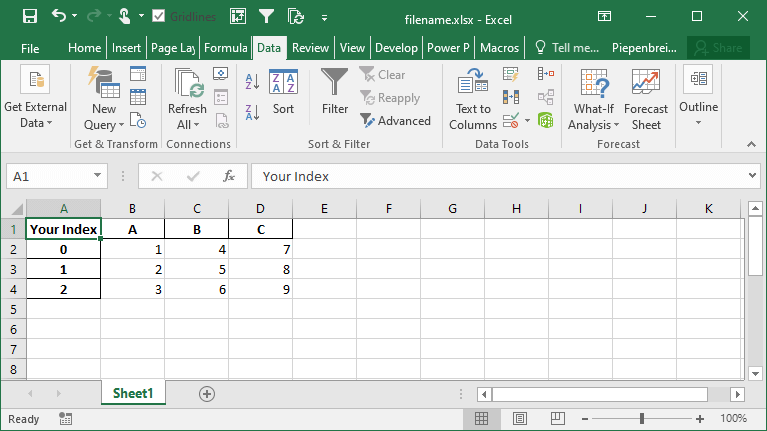
Pandas makes this easy by using the index_label= parameter. This parameter accepts either a single string (for a single index) or a list of strings (for a multi-index). Check out below how you can use this parameter:
# Providing a name for your Pandas index
import pandas as pd
df = pd.DataFrame.from_dict(
    {'A': [1, 2, 3], 'B': [4, 5, 6], 'C': [7, 8, 9]}
)

df.to_excel('filename.xlsx', index_label='Your Index')
This returns the following sheet:
How to Save Multiple DataFrames to Different Sheets in Excel
One of the tasks you may encounter quite frequently is the need to save multi Pandas DataFrames to the same Excel file, but in different sheets. This is where Pandas makes it a less intuitive. If you were to simply write the following code, the second command would overwrite the first command:
# The wrong way to save multiple DataFrames to the same workbook
import pandas as pd
df = pd.DataFrame.from_dict(
    {'A': [1, 2, 3], 'B': [4, 5, 6], 'C': [7, 8, 9]}
)

df.to_excel('filename.xlsx', sheet_name='Sheet1')
df.to_excel('filename.xlsx', sheet_name='Sheet2')
Instead, we need to use a Pandas Excel Writer to manage opening and saving our workbook. This can be done easily by using a context manager, as shown below:
# The Correct Way to Save Multiple DataFrames to the Same Workbook
import pandas as pd
df = pd.DataFrame.from_dict(
    {'A': [1, 2, 3], 'B': [4, 5, 6], 'C': [7, 8, 9]}
)

with pd.ExcelWriter('filename.xlsx') as writer:
    df.to_excel(writer, sheet_name='Sheet1')
    df.to_excel(writer, sheet_name='Sheet2')
This will create multiple sheets in the same workbook. The sheets will be created in the same order as you specify them in the command above.
This returns the following workbook:

How to Save Only Some Columns when Exporting Pandas DataFrames to Excel
When saving a Pandas DataFrame to an Excel file, you may not always want to save every single column. In many cases, the Excel file will be used for reporting and it may be redundant to save every column. Because of this, you can use the columns= parameter to accomplish this.
Let’s see how we can save only a number of columns from our dataset:
# Saving Only a Subset of Columns to Excel
import pandas as pd
df = pd.DataFrame.from_dict(
    {'A': [1, 2, 3], 'B': [4, 5, 6], 'C': [7, 8, 9]}
)

df.to_excel('filename.xlsx', columns=['A', 'B'])
This returns the following Excel file:
How to Rename Columns when Exporting Pandas DataFrames to Excel
Continuing our discussion about how to handle Pandas DataFrame columns when exporting to Excel, we can also rename our columns in the saved Excel file. The benefit of this is that we can work with aliases in Pandas, which may be easier to write, but then output presentation-ready column names when saving to Excel.
We can accomplish this using the header= parameter. The parameter accepts either a boolean value of a list of values. If a boolean value is passed, you can decide whether to include or a header or not. When a list of strings is provided, then you can modify the column names in the resulting Excel file, as shown below:
# Modifying Column Names when Exporting a Pandas DataFrame to Excel
import pandas as pd
df = pd.DataFrame.from_dict(
{'A': [1, 2, 3], 'B': [4, 5, 6], 'C': [7, 8, 9]}
)
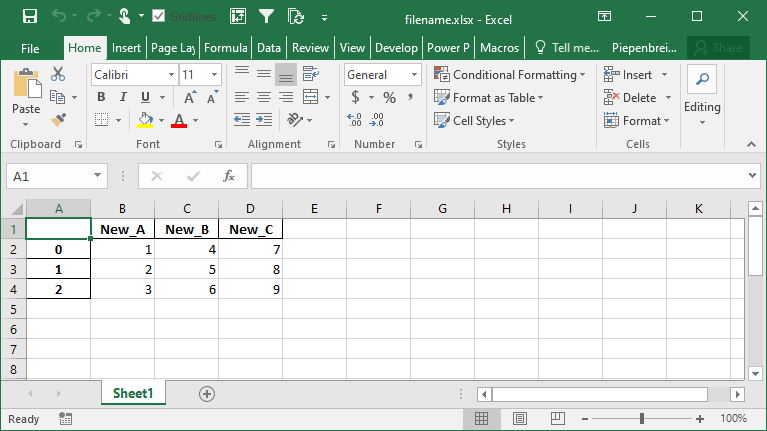
df.to_excel('filename.xlsx', header=['New_A', 'New_B', 'New_C'])This returns the following Excel sheet:
How to Specify Starting Positions when Exporting a Pandas DataFrame to Excel
One of the interesting features that Pandas provides is the ability to modify the starting position of where your DataFrame will be saved on the Excel sheet. This can be helpful if you know you’ll be including different rows above your data or a logo of your company.
Let’s see how we can use the startrow= and startcol= parameters to modify this:
# Changing the Start Row and Column When Saving a DataFrame to an Excel File
import pandas as pd
df = pd.DataFrame.from_dict(
{'A': [1, 2, 3], 'B': [4, 5, 6], 'C': [7, 8, 9]}
)
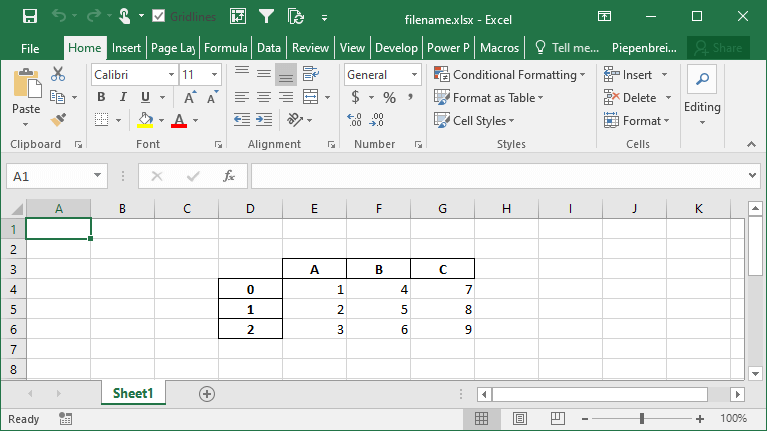
df.to_excel('filename.xlsx', startcol=3, startrow=2)This returns the following worksheet:
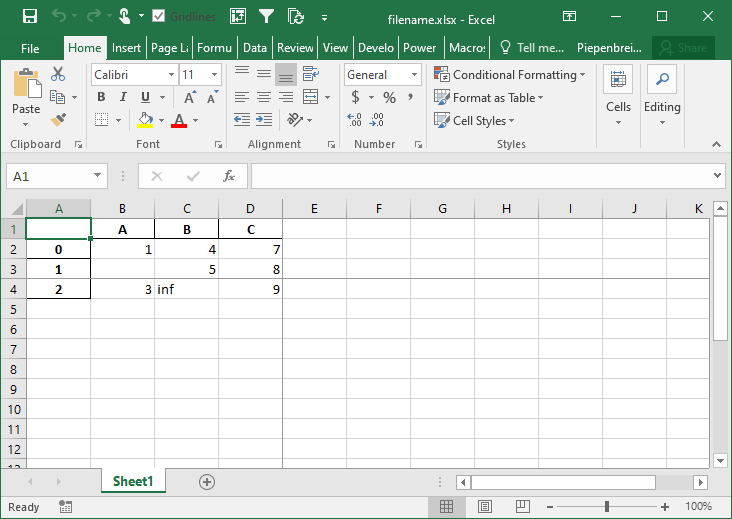
How to Represent Missing and Infinity Values When Saving Pandas DataFrame to Excel
In this section, you’ll learn how to represent missing data and infinity values when saving a Pandas DataFrame to Excel. Because Excel doesn’t have a way to represent infinity, Pandas will default to the string 'inf' to represent any values of infinity.
In order to modify these behaviors, we can use the na_rep= and inf_rep= parameters to modify the missing and infinity values respectively. Let’s see how we can do this by adding some of these values to our DataFrame:
# Customizing Output of Missing and Infinity Values When Saving to Excel
import pandas as pd
import numpy as np
df = pd.DataFrame.from_dict(
{'A': [1, np.NaN, 3], 'B': [4, 5, np.inf], 'C': [7, 8, 9]}
)
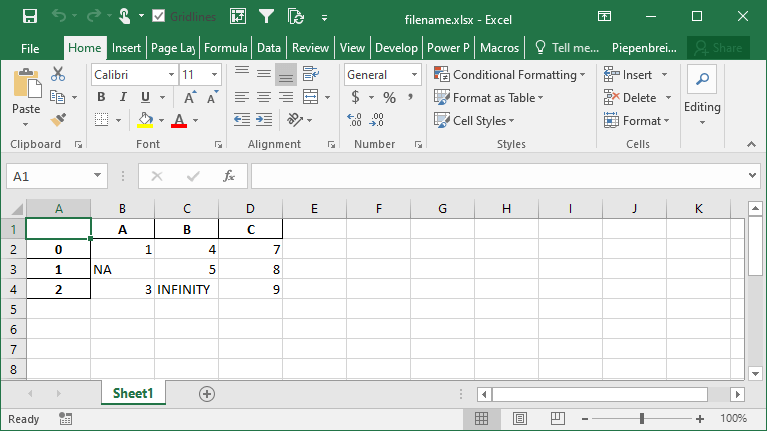
df.to_excel('filename.xlsx', na_rep='NA', inf_rep='INFINITY')This returns the following worksheet:
How to Merge Cells when Writing Multi-Index DataFrames to Excel
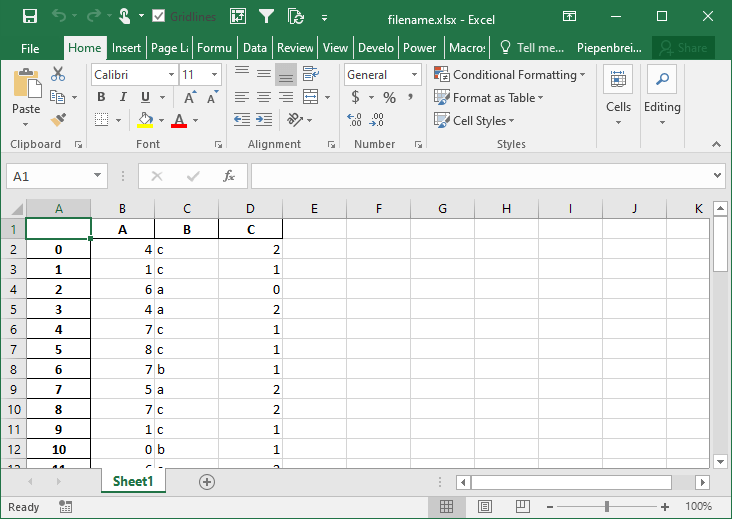
In this section, you’ll learn how to modify the behavior of multi-index DataFrames when saved to Excel. By default Pandas will set the merge_cells= parameter to True, meaning that the cells will be merged. Let’s see what happens when we set this behavior to False, indicating that the cells should not be merged:
# Modifying Merge Cell Behavior for Multi-Index DataFrames
import pandas as pd
import numpy as np
from random import choice

df = pd.DataFrame.from_dict({
    'A': np.random.randint(0, 10, size=50),
    'B': [choice(['a', 'b', 'c']) for i in range(50)],
    'C': np.random.randint(0, 3, size=50)})

pivot = df.pivot_table(index=['B', 'C'], values='A')

pivot.to_excel('filename.xlsx', merge_cells=False)
This returns the Excel worksheet below:
How to Freeze Panes when Saving a Pandas DataFrame to Excel
In this final section, you’ll learn how to freeze panes in your resulting Excel worksheet. This allows you to specify the row and column at which you want Excel to freeze the panes. This can be done using the freeze_panes= parameter. The parameter accepts a tuple of integers (of length 2). The tuple represents the bottommost row and the rightmost column that is to be frozen.
Let’s see how we can use the freeze_panes= parameter to freeze our panes in Excel:
# Freezing Panes in an Excel Workbook Using Pandas
import pandas as pd
import numpy as np

df = pd.DataFrame.from_dict(
    {'A': [1, np.NaN, 3], 'B': [4, 5, np.inf], 'C': [7, 8, 9]}
)

df.to_excel('filename.xlsx', freeze_panes=(3,4))
This returns the following workbook:
Conclusion
In this tutorial, you learned how to save a Pandas DataFrame to an Excel file using the to_excel method. You first explored all of the different parameters that the function had to offer at a high level. Following that, you learned how to use these parameters to gain control over how the resulting Excel file should be saved. For example, you learned how to specify sheet names, index names, and whether to include the index or not. Then you learned how to include only some columns in the resulting file and how to rename the columns of your DataFrame. You also learned how to modify the starting position of the data and how to freeze panes.
Additional Resources
To learn more about related topics, check out the tutorials below: